Saturday, December 17, 2011

Scrap glass to beauty!

Scraps of glass turned into beautiful artwork. This is my latest obsession at the torch! Scrap pieces of Boro (COE 33) glass. It has a different look from both sides, and tons of sexy texture!
Boro you say??? But I work in soft glass... YES! Yes I do. Not only do I work in soft glass but I work on a minor with only a 5 LPM oxygen concentrator. These are so much fun, and so different from working making beads. not to say it is difficult, its really not if you are even a novice glass worker. However the results are simply stunning! There was a little trial and error with this, and now I can not stop thinking of things to do, patterns to create, and tools with texture! I think I am even going to carve out my own patterns in graphite! Yes I am that excited about these! I plan to take more pictures and have them up on facebook, and to use in the tutorial.

Scrap Dichro


Oh yea.. I am writing a FREE tutorial for these as well! I will show you exactly how you can achieve a great look using just scraps of dichroic glass. First dibs will go to members of Connecticut Lampwork facebook page, then it will be available here for all. I will also throw up the link on LE to my glass family. I will be taking pictures of each simple step this week and have them up ASAP. I may even throw in a video... We will see.


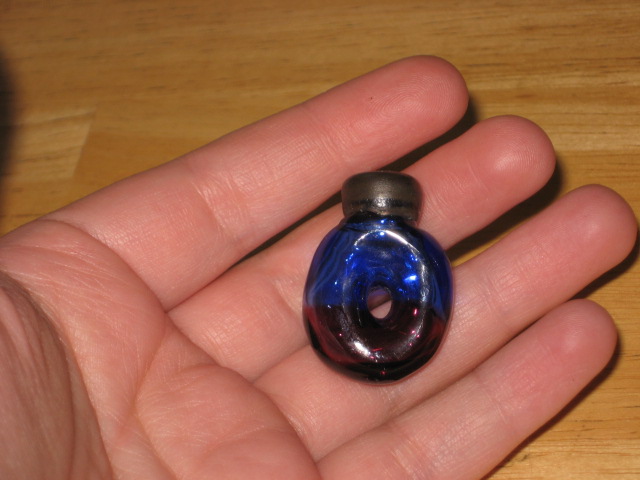
If you would like one, or any of my other work, they are on display at Artsake Gallery in Tolland.
If you cant get there or are too far, please contact me. I currently have a good number of them, but do not have them up for sale online. I can even get them in the mail as soon as Monday so hopefully you might have it before christmas. If you are local I can even deliver! What service!!!

~Jaci
Happy Holidays!


Artsake Gallery is located at the corner of Rte 74 and Rte 30 in Tolland, CT.
Come in and visit us! Our hours are:
Wednesday, 10 am - 5 pm
Thursday, noon - 8 pm
Friday, 10 am-5 pm
Saturday, 10 am-2 pm 


Friday, November 25, 2011

Black Friday... Get something meaningful!

It's black friday, everybody knows it. But did you know that small businesses and local handmade artists are having shopping events today all over the country? Check your community news! Here we have open studio (aosct.org) starting today. There is also a big brazen Betty's info craft sale in Torrington today with an 'occupy wall street by small mall' event as well promoting indipendant crafters and artists! Get out and buy handmade!!!! The reward of supporting your local economy and artists is far better and more satisfying than the chance for a free hunting coat at cabela's....

Saturday, November 19, 2011

Shows shows shows!

The past few weeks I have been doing a show a week. Until today I was loosing hope of finding a good show! Today's craft show at the Lebanon fire department was great. Thank you to all who attended. You really made this show a success. Now to gear up for open studio this weekend and open house for 'Flights of Fancy' gallery in stafford ct. Open studio is great!

I will be on hand in tolland at Artsake Gallery. The gallery is on the corner of rt 30 and rt 74. 273 Tolland Stage Rd tolland ct for all you gps goers! Please stop by to see multiple artists and many many live demonstrations! Fri/sat/sun this weekend and the first weekend in December! (nov 25-27 and dec 3-4) Artsakeframing.com

Sunday nov 27th, a yearly event, at 'Flights of Fancy' in stafford springs. It's just a few miles up the road from Artsake on rt 30 is stafford ct. There will be many many artists for the day and entertainment! Everything from spun alpaca done on sight to prints, jewelry, folk art and more! I will be back and fourth from this and open studio (luckily they are just down the road from one another :)

 December 2-4th is also the Tolland 'Art Mart' at the Tolland Art Center on the Tolland green. Friday night Saturday and Sunday. Although I am not required to be there for sales, I will pop in and out thought the weekend. This too is right up the street from Artsake (remember the open studio thing going on at the same time) :)

 So which ever place you go be sure to see great art at all of them :) appreciate art and artists this holiday season and every day throughout the year and as always... BUY ARTIST DIRECT!


HAPPY THANKSGIVING everyone!!!

Thursday, September 15, 2011

Yay!

Well the studio is up and running, as is the torch! My artfire store is still open as well. I have been torching again for a few days now!

I will get some pics of the studio when it is more finalized all around, and keep you posted on some new beads :) Artfire will be open as long as it continues to pay for itself, so I encourage all of you to support it.

Jen has been a great friend to work with in her framing shop and glass studio. I am so grateful to have her in my glassy life :) It is a privilege to work with her! You better believe we will be cranking out beads for the fall, and winter!!! You can always find Jen up there, and I am usually up there a few days a week as well. Click here for Artsake Information

I have just one show for now (Oct 1 in Stafford Springs- Hyde Park 12-7pm), and I will probably pick up a few others on short notice through christmas. Autumn in the Park is a great show that really focuses on the artists. It is one of my best shows every year, and I love going back to it. This year, I will have not only my work, but some of Terri George's Polymer Clay beads, and hopefully some of Jen Hopkins glass as well. Jen will be at the shop in Tolland, but I am hoping that Terri can join us for the beginning of the day before she heads to work. Click here for info on the Autumn in the Park

I am also looking forward to Open Studio this year. I am not participating as an artist this year, but will be around to help out Jen in the shop and probably be torching...  Jen will have a variety of artist who will be showcasing their work at Artsake this year. I will be sure to participate next year (I was not up and torching this year early enough to participate this year ).  Click here for Open Studio Information

 So far I have been putting out feelers for how my fellow crafters have been doing. It does not look too good right now. However we just had a hurricane, (well tropical storm when it officially hit us) and a lot of people have not really recovered from that yet. There are still many with home damages, and many more who are just missing out on the last days of summer due to extra work at their jobs, and/or homes to clean up their houses, yards or their neighbors.

I have also heard about a lower turn out at the local fairs for crafter booths, and also at the farmers markets. I will be talking to some of my friends on the show circuit in the next week or so, and see how that is going. I can only hope that with weather making some miss out on early fall craft shows that they will be eager to buy in the next few months.

I will write soon, and I hope to pick up writing weekly again soon as well. It is just challenging without internet at home!

Monday, August 22, 2011

General Update:

Good news to those who glass...
     I have partnered with a glass buddy of mine, Jen Hopkins, and will be setting up studio at her frame shop Artsake in Tolland in the old firehouse at the corner of Rt 74 and Rt 30! Very exciting for me and her both! Look for more of our work, and classes coming soon! I also wanted to add that my Artfire is still open for now. I started my free trial the day before pricing kicked in, and then sold an item (I am having a bit of trouble contacting the buyer...but thats e-selling for you right??? the way it always happens! lol) SO as long as atrfire pays for itself it will be open :). I still have many things in Bolton for sale at the shop, and now in Tolland in the frame shop as well.

I was also invited back, and will be participating in Stafford Springs, "Artist in the Park" October 1st in Hyde Park Look for more information soon! Jen and I will be collaborating a few shows I am sure coming this fall and into winter. I am a bit excited, and already corrected my excitement typo's so I am sure I missed a few!

Updates to come!

Sunday, July 17, 2011

No More Online Sales for me...

As of August 15th Artfire will no longer be free. This is the site I have been hosting my work at online, because its free and easy to use. Sadly I do not make enough sales online to justify paying for an account. I have yet to make so many sales to cover what a monthly membership would cost. I will always make item available to pay online, (via paypal at this point) BUT I will not have a storefront as of now. I may think about creating a page here on my blog with prices and pictures of some items, and the directive to e-mail for an invoice. But without a good following it is not worth my money now to pay for listing online. I may in the future have a few listings on etsy again. I stopped listing etsy previously after my listings expired because of the same reasons, not enough sales to cover my costs.

I will only have my work available in Bolton CT for now, and will update as I find more venues to sell locally, and possibly a few shows in the fall. I have most of my glass stuff in storage now, and it may not be as easy to pull off shows this fall. I will try though to get what I have out for sale in shows this fall. How many shows I do will ultimately come down to inventory. I have no place to torch as of now. So no custom orders or christmas ornaments will be available. I am looking into finding a place to torch, and hope that I can torch again within 6 months time. I will keep you posted.

Please feel free to contact me for local shows in CT or house parties. I can be available on a limited basis. I really do enjoy participating in shows as a vendor, and am still able to do small demonstrations.

ALSO: If you torch, and have a set up, I would love a play date! I can even bring my stuff with me (torch, glass and all!) I would love to trade some skills for torch time, or even some glass, beads or finished pieces.

Enjoy the summer! I am, even without the torch, I'm having some fun!
~Jaci

Saturday, June 25, 2011

Long time no post!

Sorry for such the delay in posting everyone! Its been a crazy few months. My Studio is not in storage once again, but for the promise of a better one in the future right? Well that's the plan anyways. I am not torching or teaching at the moment, but I plan to resurrect things in 6 months. I miss my torch already! More than that, I have no internet! There is NO internet where we live now, up in the woods. Nice place, but no internet is not so fun.... especially when you are used to doing business on it, and blogging, and having an established online community  family already! I miss my online friends, but think of them often. I was not expecting at all to not have internet, or torch time, or a place to torch for that matter at all. But life happens, as it should. The loops that we are thrown are just a testament of our journey. They are may times inconvenient and unexpected, but not always a bad thing in the end.

The most important thing now is that I have my family, and we are all healthy, have jobs, and living life as much as we can. I apologize now for now, for not having the resources to be online as much as I should, and not keeping up with the blog and probably having some delayed response time in things like LE, Artfire, and e-mail.  Please know that I am still here, I still have my studio (packed but still mine), a not so small inventory of items already made, and in stonecraft cottage, and listed on artfire. I will not be taking any special orders of course, or teaching until I am up and running again, but I do plan to continue these things in the future. I may even do a few shows (maybe with my torch) towards the end of summer and fall.

I thank you all in advance for your support and patience with my business and 'online life'.

Saturday, April 23, 2011

New Hollow's

New hollow bead style for me today! I told you I would try something I had not done in a while, and I did! I played with hollows and I PLAYED, no production work at all, just play :). I probably should have re-read my own tutorial before jumping in. It has been over a year since I dabbled in the art of the hollow bead! I did not want to do anything normal, so I decided to take a little idea from the cool blown glass vases with the hole in the center!!! I got these. Hollows with holes! They honestly were not as hard as I thought, they just take patience and slow going. I will be working on a tutorial soon enough!


Layers of DSP, med intense blue and deep purple :)


Aqua, Blue and Green Glass.

Sunday, April 17, 2011

I am in block...

Blogger block. It is probably because I have not torched in weeks! I have been so busy with work, a show, a store I keep stuff in, time dedicated to the family, birthdays, easter is coming, court with the BF's X wife. and BF's car (yes its a work in progress!)

None of which is really any fun to into any great detail about, but I am neglecting my blog, and my glass!
I have not even re-connected my torch since I brought it for the demo! I really need to look into buying a second torch so I do not have to disconnect my main torch. I have a HH I could bring, but it is SO loud I can not hear my customers and onlookers.

For now I will just leave you with the thoughts in my head about glass I have been dreaming about.
Zebra stripes and keys... and big flat focal beads.. bead sets and colorful blends, and new frit combo's and new color combo, and the good ole' ones too! Silver leaf, blues greens and yellows! The list goes on. I also want to work on some hollows. I have not done any work on hollows in a while! Its a phase thing with me... I make them for weeks, then make none at all for a long time. So I will leave you with the hollow tutorial, and the thought of making something you have not done in a long time.


here is the page link to the tutorial :)
http://fireglassbeads.blogspot.com/p/hollow-tutorial.html

I will have something else very interesting to post about soon! :)

Sunday, April 3, 2011

Show stuff #2

The week s about show's and I had one yesterday, a bit slow I may add... but it was not the promoters fault, there was tons of advertising and lots of vendors, and in previous years was busier.

I love doing this local craft show. It is at the local high school and benefits the 'project graduation' drug free party. Great cause in my own town, of course I do this show! :)

This is by far one of the most organized shows I go to ANYWHERE! Bev, who is in charge has plenty of high schoolers on hand to unload and pack up your vehicle! Literally I was trailing behind with ONE tote bag, saying... uhh.. did you want me to carry something?? I was unloaded in less than 3 minutes, Tables, torch, oxy con and all! These kids rock, and they are there to help you get it to your car when you break it down too! There is also a very organizes break, and food (breakfast and lunch) system for the vendors, and the student really are careful with your stuff.  I have paid 4 times as much money and gotten A LOT less at a lot of shows! The show is well advertised and they try to schedule a bake sale, and a car wash (outside) so there are maximum people stopping by. There were more signs up this year than ever, and in a wider area as well. I say the ad;'s in the local papers, and whatnot too. So why was it slower than last year???? who knows... economy? timing? I am just glad that I made money, and so did the kids!

I was a bit over packed this show. Hey, it was my first show this year, and I had a new set up I was trying out. Yes I used my checklist (and no I did not bring everything on the list! LOL) It was great as usual. My over-packing was actually in the sign-age department this time. See I got these cool stands that I have not used before, and I started pricing things individually more than in groups this year, (due to placement of products). The stands I used were awesome! My set up was easy, and fast! Yet still was pretty, and easy to shop. So back to these stands! A great find off of craigslist!!! They used to hold coffee... But they are perfect for jewelry boxes, and they have pegs on the sides for hanging stuff! I used 2 stands (I bought 5, for $5 bucks a pop!). It cut down on my tables needed! That in itself was a plus! I also took the sides of one rack and put whiteboard contact paper on it! PERFECT for writing out the prices and description of the product, with dry erase markers. This is why I had so many extra picture frame style signs, well this and I just did not go through my sign stash and bring what I needed.. I was a bit short on time, and the show is literally 8 min away from home. I have a bunch of necklaces that I made very simple, with one bead, that I sell at one group price, and some wire chocker style necklaces that I also sell for one set price. This was perfect to display and price them. I like to cary some simple items at a low price along with some pricier items. I find that when I have a price for everyone, I sell more. The second stand was a dedicated bead shop. It homed earring pairs, sets and focals :) I was very happy to sell a bunch of beads from that stand! Usually in the past at this show in-particular I have not sold any "just beads" other than BHB's for bracelets! I was thrilled!

My demo was a hit! People really sometimes just do not understand what you are talking about until you show them... I was also very happy the jewelry makers in my area are becoming more educated about Lampwork beads! I was thrilled when one customer walked in, said "Oh lampwork beads !!!! Are they kiln annealed???" Yes of course! She was ecstatic, and frankly so was I.

I can't believe did not even take any pictures of my set up yesterday! (bummer!!) Oh well next time!

One show down.... how many more to go???? IDK... It depends on how much I get to the torch!

Wednesday, March 30, 2011

My Show Check List

I made a check list for my show packing list a whole back, for a big show, and it helped me immensely! Of course I was ridiculously over-packed.. but hey.. you live you learn! I have since modified my list greatly! I use this general list to prep for all my shows. It helps me pack what I need, and eliminate what I do not. I find I modify this often to each event, or to specific events with either space restrictions or other needs. When I go through my check list if there is something I know I don't need, good, at least I thought about it. If there IS something I need, even if I do not use it often at shows, I usually keep it on the list as well. That way when I look at the list I remember. I also have been known to attach a sheet with a outline of the booth I have. 10x10 in comparison to say a 6x14 space is a totally different set up! I can pencil in my ideas, and have a starting point when I get to the booth, which is many times an unknown adventure in itself! Please feel free to use any or all of it. If you would like it e-mailed to you please leave a comment, or e-mail me :) I will be happy to e-mail it to you in PDF Word or Open Office format.
Packing this is a totally different story!!
I have a large luggage duffel bag with wheels, and a roller bar that I try to put things like the office and srt up small trays and what not in. I use shoe boxes (they are at the $1 store) and stack them. If I fill it I can get 6 boxes in it, and have room for something at the top. I can also pack it on top of the boxes with my table coverings if I plan right! lol
Any way you choose to pack it, make it as easy break down and re-pack as it is to unpack!

A few tips on packing this stuff up & then some:
~Anticipate the size of the crowd. Do you really need all three boxes of business cards and sales slips for a show that only 1000 people are expected? probably not. Yes we all want to say yes.. but 2 boxes is probably more than enough!

~Organize. It looks not so good when you are fumbling for a pair of pliers or a sales receipt or a pen in the middle of a show.  Dedicate a box or bag or section of____ to hold XYZ. Label boxes/bags if you can not see into them, or color coat things.. red for sales supplies, blue for business cards.. etc. Make it work for you! When setting up, it will be easy to have what you need right at your fingertips!

~Zip locks are your friend for small stuff

~Signs do not always reflect what you want them to... So make sure you have a back up. Either print out some signs that you can write in the price or have a blank ready for an item you may have missed! When its all out on the table, there is a lot that you see that you did not see in your studio! :)

~ Don;t try to demo if you know you can not. For whatever reason, be it, to many people, and no one to watch your stuff while you demo, the wrong space, safety concerns, just to much work, your show neighbor keeps knocking into things, your really tired, up all night, just not worth packing, you realize its not the crowd to demo to... whatever! ... dont do it. Have pictures, maybe a book, a few rods of glass, and some beads on the mandrel. Just as good! So much less to have to try and juggle.

~Have a buddy if possible. It is nice to be able to walk around and get a sense of the rest of the show. Not to mention the breaks you will need to get a drink and go pee, at the least. If you dont have a buddy, get to know your show neighbors. Chances are they have been in your shoes, or are in your shoes and are more than willing to help you out. Be sure to be polite. Meeting your show buddies can also lead to seeing them at more shows and networking about shows that are good, and which to avoid. 9 times out of 10, you meet great people! But there are some duds out there, so be aware!

~Don't push yourself too much. You wont want to do any shows again!

More in a few days.....
:)

Sunday, March 27, 2011

The Week To Come... JOBS... and Show Prep

Well it has been an interesting week!
I started a job at a really neat company. So far its a pretty cool job, no complaints! I had a second job all lined up too... I trained, and showed up my first day, and... let down!!! Some kind of mis-communication between management, and the girl already working my shifts prior is not leaving after all. (WTF)

I was really looking forward to it!! Bartending at a sushi bar! F U N, goo hours, sat night till 11, and sunday evening til 10, (and sushi!) Really nice people too. I hope that they call me in to work in the future. I really want to keep bartending on a regular basis, even if its not there.. but for now, I guess I will keep looking.

I have to stop in and request payment for the hours I trained (and did not get tipped for) and I am thinking of asking if they want me to stay on as a fill in. This way when the girl actually decided to leave (it kindda seems like eventually she will) I can just jump in.

I am kind of mad that I really did put some serious effort into starting this job for them . I was really excited, and looking forward to it, so of course I would put the effort in. I bought new clothes.. new shoes.. (you know the all black bartender stuff) I worked a 9 hour shift at my day job, and then spent another 4 hours (ALL IN IN HEELS) bartending for my training to work the weekend... Which I did not even work, but canceled my plans, 2 weeks in a row for thinking I had a job. I had a message saying i didn't have to work the first saturday, but I was not really supposed to work that day anyways, I was just filling in. What I guess I was being told (in broken english) was the shift was covered-permanently. So I showed up for what was supposed to be my first day...

I am contemplating asking for payment in a free sushi dinner in stead of cash... I figure If they have not put me on the books, and it was just a few hours, and all this crap it is the least they can do, and it would eliminate some tension, knowing that I would have no animosity as a customer as well.

I am obviously babbling about this... It kindda hurts. I asked if I did something wrong.. They said no, it was just a mis-communication of starting me, not knowing if the other girl was actually staying.. I was hired on the spot, and they expected me to be taking the shifts, and for the girl to be leaving. I still feel rejected... :(

So no beads this weekend, and it will be a busy week at work, and I have a show next weekend. I think This week will be about prepping for shows. Checklists and some set up pics. What to bring, what I usually over pack... What I usually forget! and some stories about how to deal with customer relations. It will be more words than pics, but rest assured it IS important to keep customer relations up to be successful!

Wednesday, March 23, 2011

How To Use Frit

THIS WEEK IS  STILL ALL ABOUT FRIT

There are 100 maybe 1,000 ways to use frit. None are wrong, its just about your taste.
For the longest time I had frit but I did not really use it, in retrospect I have no idea why! It is so fun! I am frit obsessed (on a budget!) Which means I do not have a collection to the likes of some of the great LE'ers.. yes you have seen their great mountainous walls of frit. Rotating display racks, to fit the jars, and even specially installed shelving. THAT is just not me.... y e t 
That is me in my dreams! Well that and many other glass fantasies... So lets talk frit!
Weather you make the simplest bead, and roll it gently on your bead, only slightly melting it in, or you make a base, roll in frit, and encase to magnify its awesomeness you have got a great bead! And it was not all that hard! 


5 Great Ways To Use Frit The First Five!
1) Make a bead, roll in frit. Leave frit partially raised but attached. (sugar beads is a great example!)
2) Make a bead, roll in frit. Melt in the frit. Take a rake and drag the frit in one direction or many! Your choice!
3) Make a bead base, roll in frit. Heavily encase. The clear (or transparent of your choice) will magnify the look of the frit seeming suspended in the middle. Experiment with the base colors, and layering colors that create different variations of color with the same frit blend. (The picture to the left has dots of clear that you can see the magnification in)

4) Make a bead to be pressed. Use a lighter transparent color, and roll in tons of transparent frit of a darker transparent reduction frit. Melt it in in a slightly reducing flame, and press. The edges of the frit will be slightly silvered.

5) Work off mandrel. Make a blob, roll it in frit, melt in, squish it, cut it, and pull it! Coolest effect ever! Experiment with different frit blends and color combo's!


Thursday, March 17, 2011

Make Your Own Frit Results!

I made a few test beads with the frit I made. They all came out great! This bead inparticular was not what I expected.....
This is Frit Blend #2 over Grasshopper green! TO DIE FOR! The pictures do not even do this justice! I will be using this combo more, This is a mix that resonates with island waters of tropical paradises!


Blend #1


Here are the samples, on black white and clear.


A close up of the clear.


Blend #2

On White and Clear only. (There is only one non transparent color in the mix.)

Frit Blend #3
It is a little blurry, so here are a few more pics. (click to enlarge)


Below are a bunch of pics with the different colors. Blend 1 and 2 are very similar. The main noticeable factor is that Frit blend #2 is much more of a transparent blend than the Frit Blend #1. This was my intention.
Blend #2


#2


#1 


#3

I did not have the chance to play with blend 3 as much as I thought I would at this torch session. But I am sure you will be seeing it in my work! I also think I will add more purple next time! Although I think this may look great on a few colors just like this!

Tuesday, March 15, 2011

Make Frit Blends At Home!

THIS WEEK IS ALL ABOUT FRIT

The other day when I was sooo not into making beads, but had the kiln on, I put it to good use! I heated a few rods of this color.. a few rods of that color.. and let them meet there sweet death in the happy bucket of water!
*insert evil happy laugh here*
I have been telling myself that I need a blue frit blend for some simple frited spiral pressed beads (click here to see the posting about Jim Moore spiral tongs) I also figured since I was doing it, I would throw in a green purple mix just for fun. I have made frit before by heating a glob and dousing it in water, but found this to be much easier, and give you faster more bountiful results! Recipes are at the bottom!

HOW TO MAKE FRIT:
After you pick out your colors....
1) Heat glass in the kiln.
2) Plunge hot glass into clean water bucket.
3) Evil laugh as it crackles and breaks apart.
4) Dry
5) Quick 3-5 second blend in coffee grinder, repeat as necessary.
6) Flip contents onto a coffee filter, allow to dry if needed and run a magnet through to pick up any metal flecks the grinder blade may have left behind.
7) Sift if desired.
8) Use to make beads!!!

The Breakdown!
Making the actual frit is surprisingly easy! Just heat up rods and dunk them into a clean water bucket. They turn into 3in pieces of crackled glass. They look like those antique baked marbles really, and they crumble like sand stone! Very much fun to a dork like me! Please be careful when doing this though!!! It is glass, and you are intentionally breaking it!!!

You can either use shorts, or full rods. This is a GREAT way to use up all those shorts! I knew what I wanted in a frit blend, so I used full rods as my means of measurement. I gathered a few rods proportionately and plunged them into the same water bath. IF you plan on making multiple blends, experimenting with the proportions, or are not sure what your colors will do together, SEPARATE your plunges! Use a clean container (glass or metal) for each color.  It is a good idea to spray your glass with a squirt bottle to minimize the glass dust. You do not want to breath in glass dust!!!! (google it if you do not believe me!) Also make sure to clean the coffee grinder between colors, and DO NOT use your coffee grinder for anything but crafts anymore!

You will have a mix of different sized frit. You can buy sized mesh sifters to sort them, or just find a few different sized metal or plastic mesh pieces at the hardware store and fit them anything that will create a small rim (think soda bottle slice, or small PVC pipe slice left over from storing glass, and a rubber band or larger hose clamp. You know the kind most lampworkers have laying around!!!! Tim Gunn says "make it work"!) Sift through different sizes starting with the largest size and working towards the smaller sizes. Create as many sizes you would like until you are happy with it.
When mixing crushed glass record your measurements in a journal and measure with a teaspoon or like item.
When you run out of frit you can look in your book and know exactly how to get your new favorite frit blend!!! It is a good idea to spray the glass with a squirt or 2 of water doing this as well. This will minimize glass dust. If you plan on doing a lot of this, consider wearing a respirator to avoid the glass dust!.

Remember, Mixing Frit is like mixing cocktails! They are great when they look good, and taste good! But there are always those ones that should never be mixed again! EVER! Think Rubino and Ivory, or Baily's Irish Cream and Jeggermister! Both are fun experiments, but some drinks, and frits have better results the next day....

Frit Recipes!
I used rods for proportion. I left the end of the rod stick out of the kiln, so it would not shatter. I then kept the ends so I would remember to record the results, and kept them with the crushed frit until now. (I am using them as now to list the colors I used.) The rods are all standard size about 5-6mm and all about 13in long. Standard  rods or comercial 1-2mm stringer, also 12-13in  in length. Even though I retained the top 3in of the rod the proportions stay the same.

Blue Blend #1

1 Rod Each:
(ET052) Trans Light Blue
(VT058) Trans Med Blue
(EP242) Pastel Medium Lapis
(EP232) Pastel Light turquoise
1 Stringer
(ET060)Trans Cobalt Blue


Blue Blend #2

1 Rod Each:
(EP242) Pastel Medium Lapis
(ET052) Trans Light Blue
(VT080) Trans Pale Lavender
2 Rods each:
(VT058) Trans Med Blue
(T034) Trans Light Turquoise 
(Unknowingly I grabbed one Effetre, and one Vetro. They are interchangeable.)


Green And Purple Blend

1 Rod Each:
(EP273) Pastel Pea green
(EP212) Pastel Purple
(ET071) Trans Yellow Green
(ET040) Trans Purple

Sunday, March 13, 2011

One Last Wig Wag Post!

For now anyways... You didn't think I would let you go without seeing beads made with the wig wags did you??? Check out the first 2 posting about wig wags, for wig wag recipes!

This first bead was made with a white base, layers of transparent aqua, green and blue. Then the wig wag went on. spiraling around, and around, then across and up the other side. I will give you a few different views of this one.


The bead on top has a spiral of the wig wag that was encased before being melted in. then the same wig wag was used for the flower petals. It gave the petals a really neat stone effect.  The lower pink bead was made by laying stripes of wig wag end to end on a barrel shape bead. Nothing was melted in or shaped until all the surface was covered. It looked like a pull and peel Twizzler. It is on a base of white. I was very surprised at the results! You can not even tell that there were lines in it previously. or that a wig wag was used at all. I love the effect, but it was unexpected. The wig wag was melted in very slowly.


These beads were all made using the same technique the green, purple, and the blue bead. They are made by taking a small disc bead, lining the edge with the wig wag, and then heavily encasing it with clear before melting it in. The same way you make stripe beads by stretching the dots on a disc as you melt it in slowly. The base is black or white, and the blue and green beads I encased with T080, instead of clear. I find that the trick to these beads is to make sure that your clear melts over the edges of the wig wag, and touch the core bead. This will give you really nice edged as it spreads, and even if you have to add more clear as it melts, you will not have to worry about trapping loose ends of the wig wag. 
Next week we start talking about frit!